Growing onions from seed is a rewarding, cost-effective method that offers access to more varieties, improved disease resistance, and stronger root development than using sets or transplants. Though it requires more time and planning, the benefits are worth the effort. This process involves selecting the right variety, preparing nutrient-rich soil, careful sowing, timely transplanting, and consistent care to harvest—all focusing on sustainable practices supporting healthy, long-term growth.
Step 1: Choosing the Right Onion Variety
Success with onions begins with choosing a variety suited to your local day length. Onions are sensitive to daylight, and this influences when they form bulbs. They are classified into three types:
- Short-day onions require 10–12 hours of daylight and are ideal for southern regions with mild winters.
- Intermediate-day onions need 12–14 hours of sunlight and work well in central regions.
- Long-day onions require 14–16 hours of daylight and are best for northern climates.
Besides the day length, consider whether you prefer sweet, storage, or red onions. Growing from seed offers more choices, including heirloom and disease-resistant types suited to local conditions.
Step 2: Soil Preparation and Site Selection
Onions thrive in rich, well-drained soil with a pH between 6.0 and 7.0. They require a loose soil texture to allow their roots to expand and bulbs to develop correctly.
Before sowing, incorporate organic compost or well-rotted manure to boost nutrient levels and soil structure. Avoid using heavy clay soils unless amended, as they can restrict bulb growth and lead to misshapen onions.
Choose a sunny location where onions receive at least six hours of direct sunlight daily. Onions prefer consistent moisture but are prone to rot in waterlogged conditions, so well-drained beds or raised rows work best.
Step 3: Starting Onions from Seed Indoors
Starting onions indoors provides the most control over germination and early growth. Seeds should be sown about 8 to 10 weeks before the last expected frost.
Use shallow containers or seed trays filled with a light, sterile seed-starting mix. Sow seeds approximately ¼ inch deep and lightly cover them with soil. Maintain consistent moisture and keep temperatures between 65°F and 75°F to encourage germination.
Once seedlings appear, provide ample light to prevent legginess. A grow light positioned a few inches above the seedlings works best if natural light is insufficient. Trim seedlings occasionally to about 3–4 inches tall to encourage strong, stocky growth.
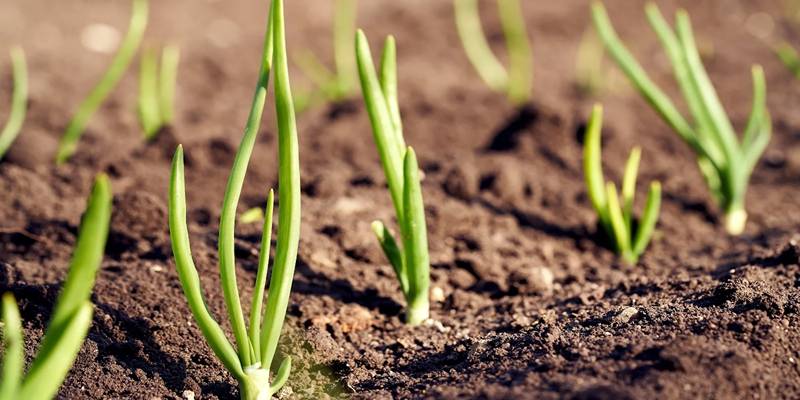
Step 4: Direct Sowing Onions in the Garden
In regions with long growing seasons or mild winters, onions can also be direct-sown into the garden. This method avoids transplant shock but requires well-prepared soil and careful weed management.
Sow seeds directly into prepared beds as soon as the soil is workable—usually 4–6 weeks before the last frost. Space rows 12–18 inches apart, and sow seeds ¼ inch deep. Once seedlings emerge, thin them 3–4 inches apart to give each plant room to grow.
Direct-sown onions require consistent moisture during the germination period. A row cover can help retain soil warmth and deter pests during early growth.
Step 5: Transplanting Onion Seedlings
Transplanting should occur when seedlings are about the thickness of a pencil and have 3–4 true leaves. Harden off the plants over a week by gradually introducing them to outdoor conditions.
Transplant into the garden in rows spaced 12–18 inches apart. Space individual seedlings 4 inches apart for large bulbs or closer for smaller onions or green harvests. Ensure roots are fully buried, and the tops remain above soil level to avoid rot.
After transplanting, water thoroughly to settle the soil around the roots. It’s essential to keep moisture levels steady in the weeks following transplant to reduce stress and promote strong establishment.
Step 6: Fertilizing and Watering Onions
Onions are heavy feeders and benefit from a steady supply of nutrients throughout the growing season. An initial application of balanced organic fertilizer at planting, followed by nitrogen-rich amendments every few weeks, will support leafy growth, promoting larger bulb development. Avoid over-fertilizing late in the season, which can delay bulb formation and compromise storage quality.
Water onions regularly, but avoid saturation. They typically require about an inch of water per week. As bulb development begins, reduce watering slightly to encourage firm, dense bulbs. Uneven watering during this phase can lead to splitting or rot.
Step 7: Weed Management and Pest Control
Weeds compete aggressively with onions, especially in the early stages of growth when root systems are shallow. Keep beds weed-free with shallow hoeing or hand-pulling, being careful not to disturb the delicate onion roots. Mulching with straw or untreated grass clippings can help suppress weeds, retain moisture, and protect soil from temperature extremes.
Common onion pests include onion thrips and maggots. Regularly inspect foliage for signs of damage, and use organic pest deterrents like neem oil if needed. Rotating crops annually helps reduce pest and disease buildup in the soil. Avoid planting onions in the exact location more than once every three years.
Step 8: Bulb Development and Signs of Maturity
As onions approach maturity, they form bulbs at the base of the leaves. It occurs naturally once the day length matches the plant’s needs.
Stop fertilizing once bulb development is underway. When the tops of the onion plants begin to yellow and fall over, it’s a sign that the plant is directing its energy into the bulb. At this stage, reduce watering and allow the bulbs to dry slightly in the ground for a few days before harvesting.
Step 9: Harvesting and Curing Onions
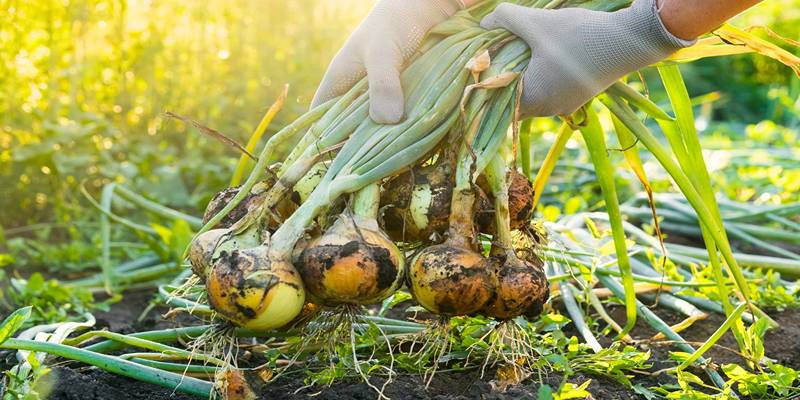
When the tops have completely fallen over and started to dry, it’s time to harvest. Use a fork to gently lift the bulbs from the soil. Handle them carefully to avoid bruising.
Cure onions by laying them out in a dry, shaded area with good airflow for two to three weeks. During curing, the outer skins dry and toughen, sealing in moisture and improving storage life. Trim the tops and roots once the necks are dry and the skins are papery.
Conclusion
Growing onions from seed requires more time and attention than using sets, but it offers clear quality, variety, and adaptability advantages. Every stage contributes to long-term garden success, from selecting the right type for your region to nurturing seedlings and harvesting flavorful bulbs.
Starting with seed also encourages deeper involvement in gardening, fostering an understanding of how light, temperature, soil, and timing interact in plant development. With patience and care, onions grown from seed can become a gratifying part of any home garden.