There's something about trekking to Everest Base Camp that feels both distant and surprisingly doable. The trail is long, no doubt, but it’s well-trodden and dotted with villages, teahouses, prayer flags, and an openness that puts everything into perspective. You don’t need to be a seasoned mountaineer. You just need time, decent fitness, and a plan that lets the mountain set the pace.
How to Trek to Everest Base Camp
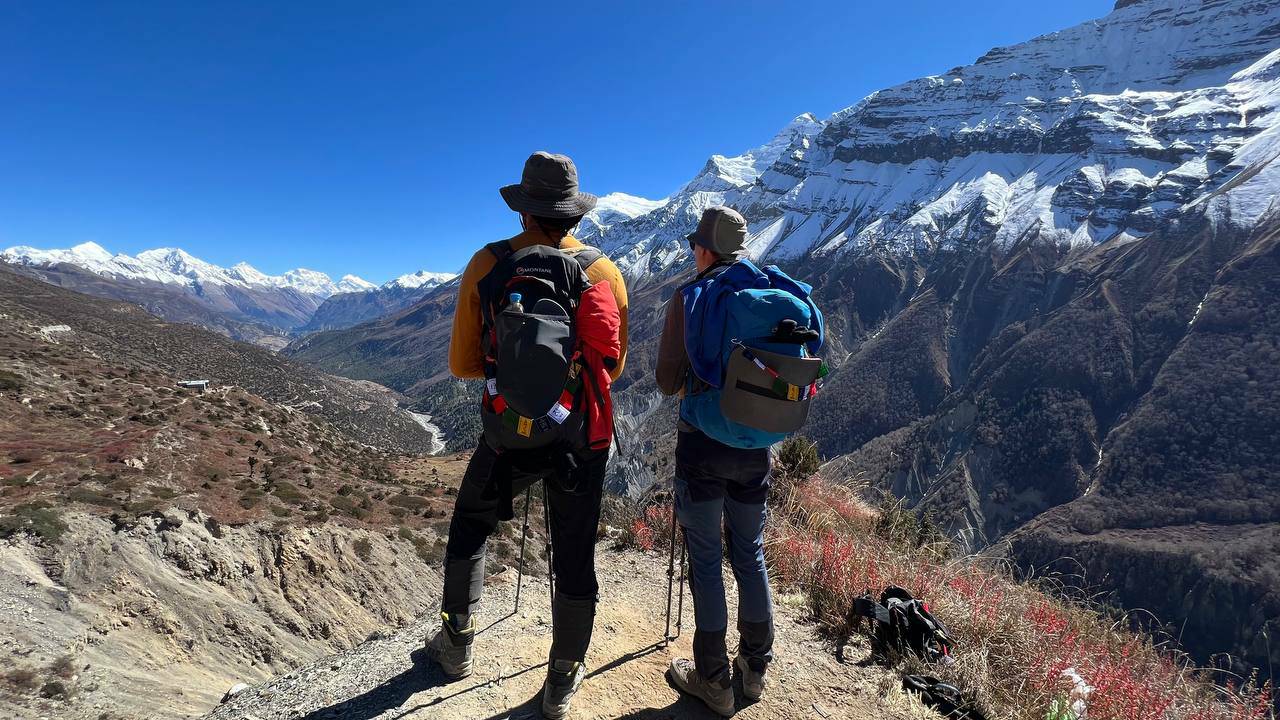
Step 1: Understand the Route and Days Required
The most common starting point is Lukla, a small town in the Khumbu region, which you can reach by a short but notoriously bumpy flight from Kathmandu. From there, it typically takes 12 days round-trip to complete the trek to Everest Base Camp and back. That includes two acclimatization days.
The trail moves through places like Phakding, Namche Bazaar, Tengboche, Dingboche, and Lobuche before arriving at Base Camp itself. Each section introduces a shift—whether it's the thinning air, the sparse vegetation, or just the weight of being closer to the world's tallest peak. You'll also get a night in Gorakshep before you walk to Base Camp and often climb Kala Patthar for views that can’t be overstated.
Step 2: Book Flights to Lukla
While some choose to hike from Jiri or Salleri to avoid the flight, most opt to fly to Lukla to save time. Flights are short—just around 30 minutes—but weather can cause delays or cancellations. Book the earliest flight possible. Early flights are less likely to get grounded by afternoon clouds or wind.
You can book tickets directly or let a trekking agency handle it. During peak season, flights can get booked out weeks in advance, so planning ahead matters.
Step 3: Secure Trekking Permits
There are two main permits required: the Sagarmatha National Park Permit and the Khumbu Pasang Lhamu Rural Municipality Permit. If you’re going through a trekking agency, they’ll usually sort this for you. If not, you can get both in Kathmandu or in Monjo on the trail. Bring passport-sized photos and carry photocopies of your passport—permit offices often ask for them.
Step 4: Pack Wisely and Don’t Overload
You'll need gear that handles both warmth and weight. Layers are key because the temperature swings are sharp. Mornings and evenings are freezing, but the midday sun at altitude is strong. Here's a basic list:
- Thermal base layers
- Insulated jacket
- Windproof outer shell
- Trekking pants
- Warm gloves and hat
- Sunglasses and sunscreen
- Water purification method (bottle with filter or tablets)
- Reusable water bottle
- Sleeping bag rated for at least -10°C
- Headlamp
- Toiletries and quick-dry towel
- Blister care and a basic first aid kit
Most teahouses provide blankets, but they aren’t always enough. Renting gear in Kathmandu is cheap and common, so there’s no need to buy everything if you don’t want to carry it home later.
Step 5: Train with Purpose
The trek isn’t technical, but it’s demanding—mainly due to the altitude. Days often involve five to seven hours of walking. Some uphill sections feel endless, especially once you're above 4,000 meters.
Train by walking long distances on hilly terrain while carrying a loaded backpack. If you live at sea level, consider doing cardio workouts that boost lung capacity. What matters is consistency. You’re preparing your legs for back-to-back walking days and your lungs for thinner air.
Step 6: Acclimatize Properly
This isn’t something to rush. Two rest days are standard—one in Namche Bazaar and another in Dingboche. But calling them “rest days” is misleading. You’ll still walk. The point is to “climb high, sleep low,” which helps your body adjust to altitude.
Ignoring acclimatization is where many go wrong. Altitude sickness doesn't care how fit you are. If symptoms hit—headache, dizziness, loss of appetite—take them seriously. Drink water regularly and walk slowly. Some people choose to carry Diamox (a medication that can prevent altitude sickness) but talk to a doctor before you go that route.
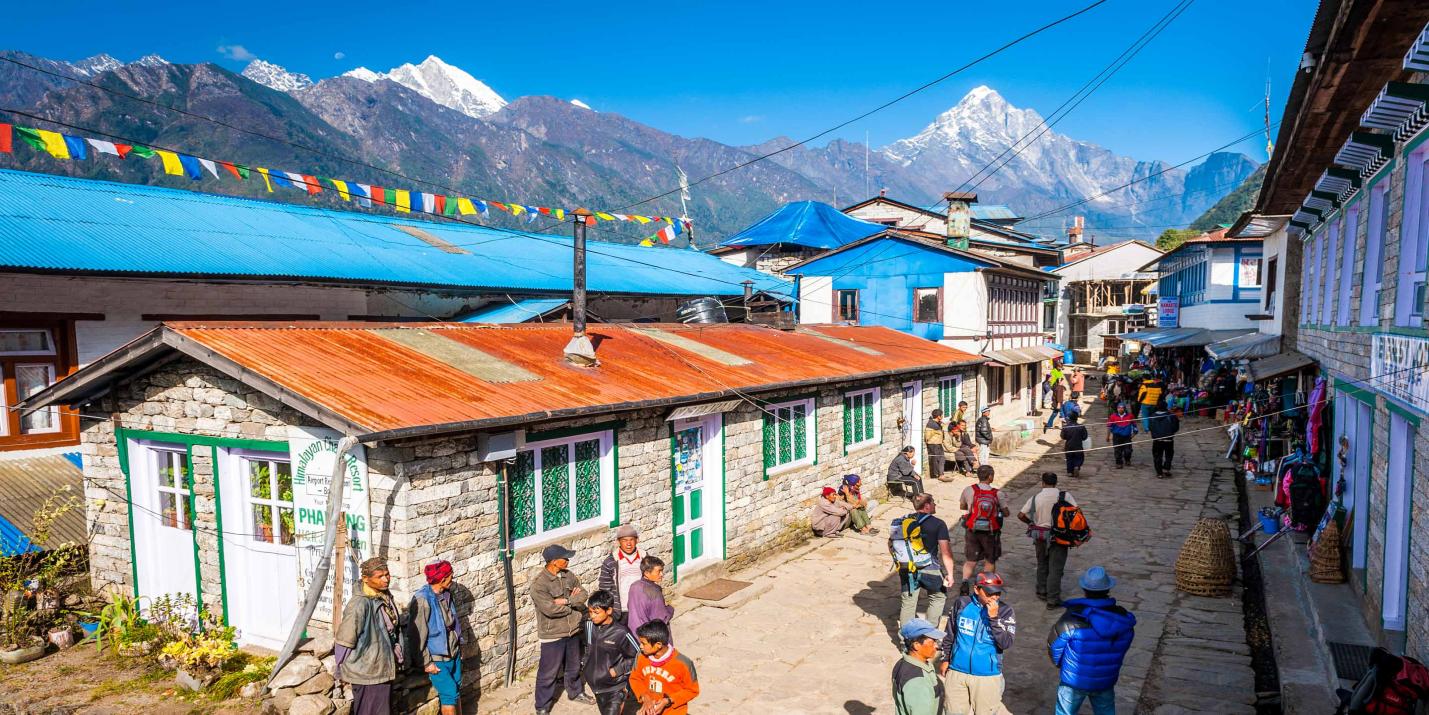
Step 7: Stay in Teahouses Along the Way
You don’t need to carry a tent or cook your meals. The route is full of teahouses—simple lodges offering a bed, basic meals, and plenty of tea. Rooms are basic, often with two single beds, thin walls, and shared bathrooms. There’s a comfort in their simplicity, especially after a long day of walking.
Meals are usually a mix of Nepali dal bhat, soups, noodles, pasta, and rice dishes. Meat is available in the lower villages but tends to disappear as you climb—due to limited refrigeration. It's best to stick to vegetarian meals beyond Namche for health reasons.
Charging electronics costs extra the higher you go, so bring spare batteries or a solar charger. And bring cash—ATMs exist in Namche, but they aren’t reliable.
Step 8: Keep Your Health in Check
At altitude, your body works harder. Hydration is non-negotiable. Drink at least three liters a day, more if you're prone to headaches. Avoid cold water whenever possible, and opt for warm water instead.
Food takes longer to digest at higher elevations, and your appetite might decrease. Eat small amounts more often, and don’t skip meals. If you start feeling off, talk to your guide or someone nearby. Even a mild headache can escalate quickly.
Basic hygiene helps, too. Wash your hands, use sanitizer, and avoid unfiltered water. While trekking to Base Camp doesn't require peak physical strength, staying well is what makes or breaks the experience.
Step 9: Hire a Guide or Porter (Optional but Helpful)
Many people complete the trek without one, but having a guide adds depth to the experience. They offer insight into the culture, monitor your health, and handle logistics. A porter carries your heavier bag, so you only walk with a daypack, which can make a noticeable difference at altitude.
Hiring locally supports the economy and ensures you’re trekking with someone who knows the land. If you do go solo, just make sure someone always knows where you are, and don’t take risks with weather or trail shortcuts.
Step 10: Time Your Trek Right
There are two main trekking seasons: pre-monsoon (March to May) and post-monsoon (late September to November). These months offer clear skies and stable weather. Spring brings rhododendron blooms, while autumn offers crisp views and dry trails.
Winter treks are possible, but they are icy and cold, with fewer open teahouses. Summer (June to August) brings monsoon rains, which turn trails slippery and reduce visibility.
Conclusion
Reaching Everest Base Camp isn't about conquering anything. It's about walking with the mountain, not against it. Each step brings you into a slower rhythm—one where the noise drops away, and what's left is effort, calm, and a kind of clarity that only high places can offer. The trek gives you long days, simple comforts, and the space to feel small in the best possible way. If you're ready for that, then the trail is ready for you.